M & G Real Estate Ventures
Written By: One House At a Time (OHAAT)
While many retirees take up leisure projects like knitting or birdwatching, two married couples are dedicating their retirement to vacant building rehabilitation in Baltimore City. Since joining forces in 2020 as M&G Real Estate Ventures, the McCaves and the Goodwines transformed seven vacant homes, actualizing their mission to create affordable housing.
Gwen and Rupert McCave created RGM Real Estate Solutions in 2018, working as investors and rehabbers in the DMV. Rupert has over 35 years of experience as an architect and Gwen discovered her passion for real estate when assisting her father with his electrical contracting business. She obtained her real estate license after retiring from her IT career. Robyn and Warren Goodwine developed their LLC, Miccar Properties, in 2015 following their retirement. Warren is a former law enforcement officer with an affinity for construction stemming from his youth when he learned carpentry skills by tinkering with his grandfather’s tools. Robyn used to work in human resources. Inspired by her father who founded a Community Development Organization to build affordable housing, Robyn holds a passion for community partnership which she prioritizes in her property investment work.
After meeting and noticing their striking similarities and goals, the couples decided to leverage their LLCs into one partnership to acquire more properties, rehab them, and sell them for new homeownership. The merger created something of a rehab super group: “Our team is currently comprised of an architect, which is me,” says Rupert, “Gwen is a real estate agent, Warren is a project manager, and Robyn is an investor. We’re all investors on the team and we do work with various contractors and have several hard money lenders and private money lenders that we work with to finance projects.”

“Once we met with One House…we saw an opportunity where we can buy these vacant properties at a lower cost.”
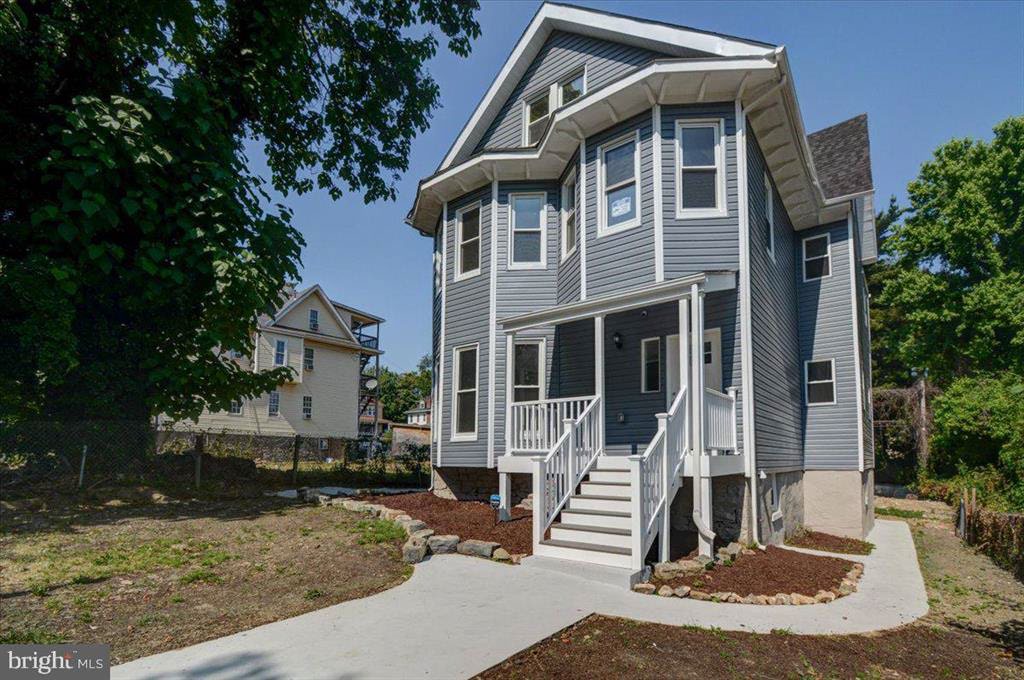
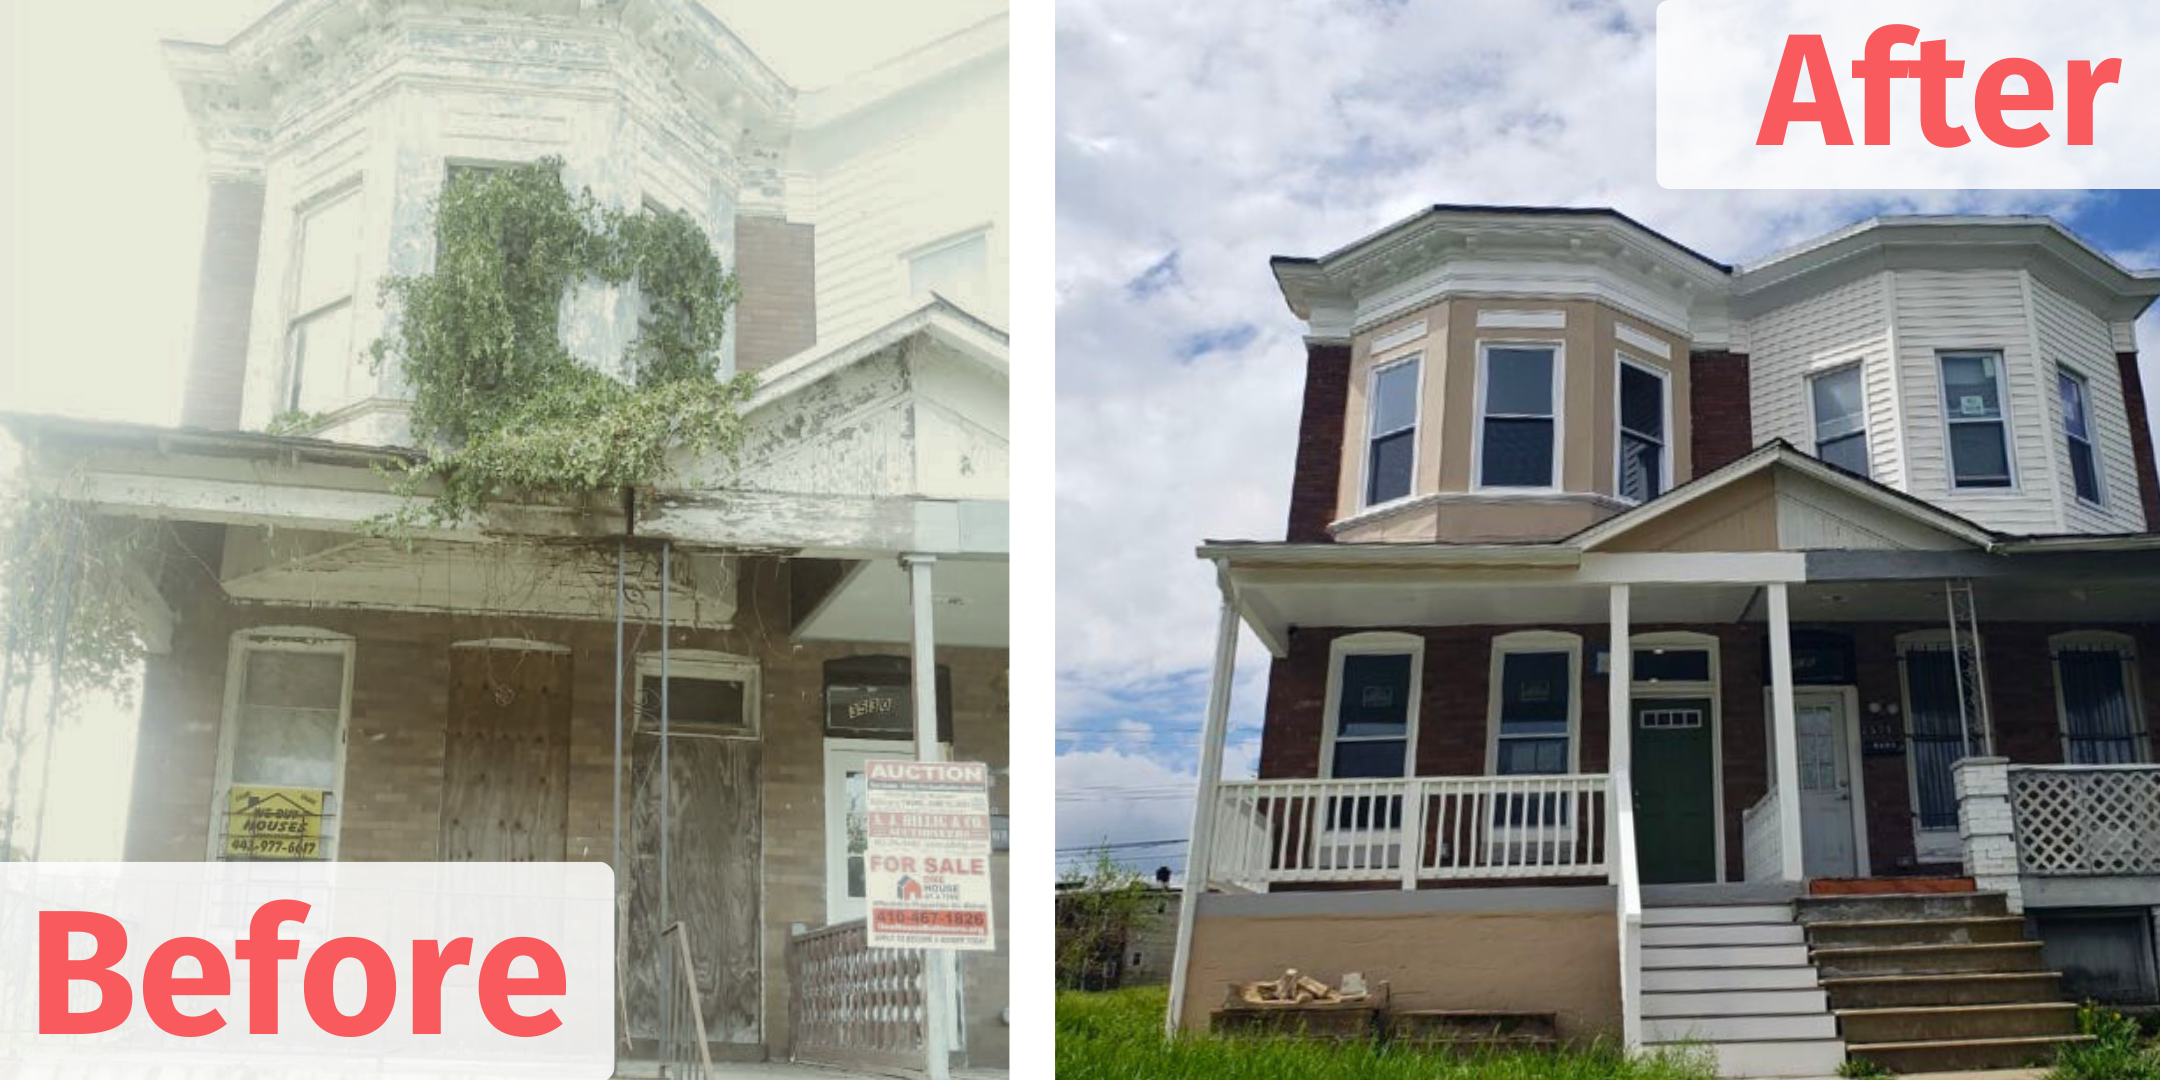
M&G purchased three of their seven completed properties from One House At A Time: 1617 N. Bond Street, 2125 Denison Street, and 3528 Park Heights Avenue. “Once we met with One House and attended the vacant building auctions, we saw an opportunity where we can buy these vacant properties at a lower cost,” says Rupert. “We know we have to put more money into the property. But the $3,000 downpayment, if we stay within a $30,000 bid, is a good segue economically for us compared to some auctions where it’s $10,000 plus the bid.”
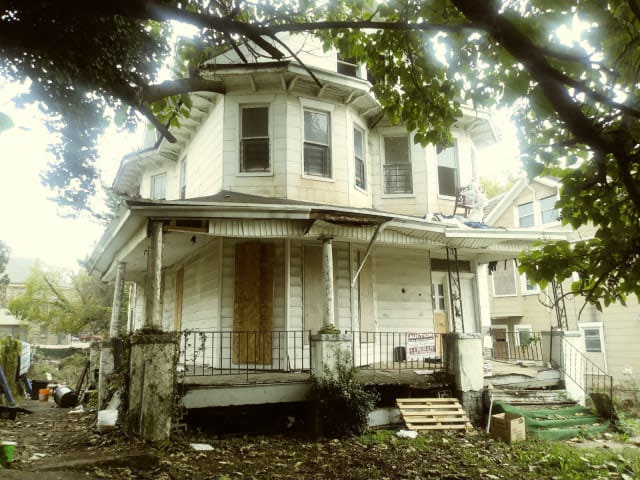
The team says the most challenging and simultaneously most rewarding project they worked on is 2125 Denison Street in Walbrook. Not only is it their largest project, but they also took on the challenge to convert the four-unit into a two-unit. They say the property required significant gutting and demolition. They cut new interior stairs, built a new exit egress tower and porch, and created a new floor plan to maximize the space in both units. One of the biggest challenges with the project was managing non-performing contractors. M&G had to replace contractors and catch the new ones up to speed on their budget, timeline, and vision for the rehab as well as ensure that they maintained those plans. Another challenge they faced was dealing with City bureaucracy. They didn’t have luck getting in touch with City agencies via phone. Instead, they learned the best way to connect is to visit the administration building in person. “Everybody’s located there. So, you can mostly get all of the answers to your questions in one day, whether it’s about title or getting a permit,” says Gwen.
“We did such a good job, we were able to put it on the market and we got a contract within five days.”
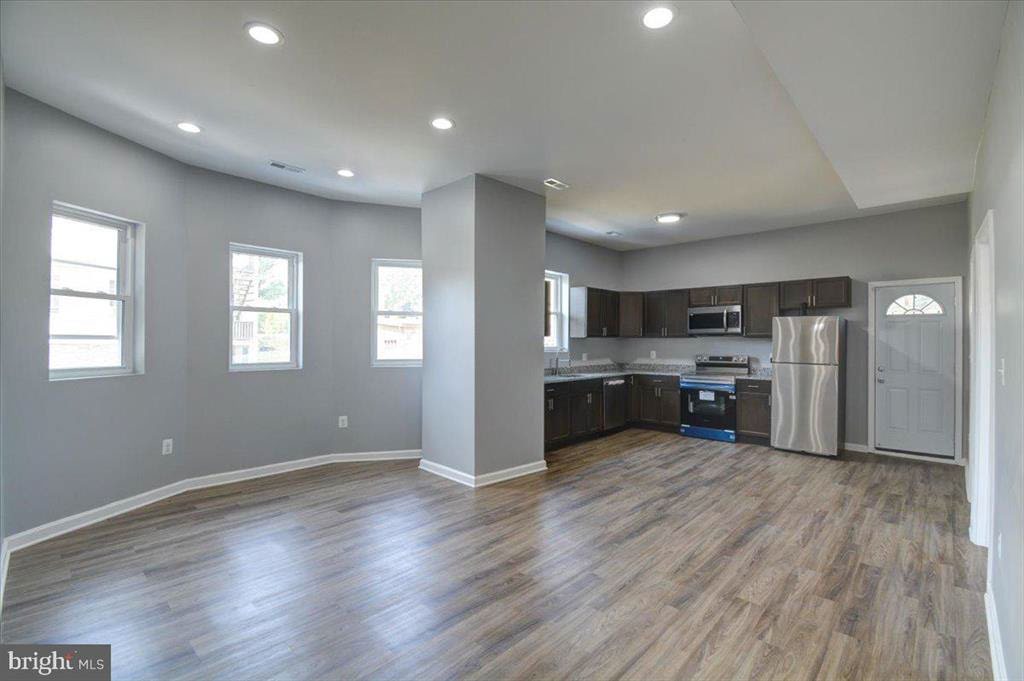
The finished Denison product features a three-bedroom/two-bathroom unit with a finished basement and a three-bedroom/one-bathroom unit with an attic floor. Each unit includes waterproof laminate floors, high ceilings, LED recessed lighting, stainless steel energy-saving appliances, granite countertops, and a washer and dryer. 2125 Denison also has new electrical and plumbing systems, new AC systems and ductwork, and a new water heater. Even with all the reconstructive work, the M&G team says they kept the architectural integrity of the building. “Because of that, we were able to sell it in five days,” says Gwen. “That’s one of the pros of that [project]. We did such a good job, we were able to put it on the market and we got a contract within five days.”

While Denison is their pride of the three, each of the M&G properties is an accomplishment in eliminating Baltimore blight, creating affordable housing, and increasing homeownership. M&G provided cash assistance to first-time homebuyers to help them close on the properties. 1617 N. Bond Street sold for $250,000 with a seller credit of $4,500 toward closing costs. 2125 Denison Street sold for $385,000 with a seller credit of $5,000. 3528 Park Heights Avenue sold for $230,000 with a seller credit of $1,500. As their real estate agent, Gwen also assisted buyers in getting involved with the City’s first-time homebuyer incentive programs. “I think the City should note that we took three vacant properties off the street and turned them into revenue properties for the City’s tax base,” says Rupert.
The team says one of M&G’s areas of strength in this field is their analytical approach. Their work style is not haphazard, but measured and well-researched. They say they are very selective with their projects and spend a lot of time analyzing properties and their markets. Before bidding in a One House auction, they attended several auctions as observers to understand how receivership auctions operate. “These properties are so distressed. If you looked at them before, you would run away. We didn’t run away,” says Rupert. “Other investors buy the property and then leave the property abandoned…We do analytical data in Baltimore City because not every location is the best [to build in]. It’s a pros and cons.”
“We’re all bringing something different to the table.”
M&G’s efficiency is a testament to how well the team collaborates. They mention that, as two married couples working side-by-side, they’ve learned to agree to disagree on certain things. But they believe the variety of perspectives and backgrounds are the glue to their operation. “We all work together because we’re all bringing something different to the table,” says Warren. “We have a second set of eyes on everything,” says Gwen.
And what makes this laborious retirement career worthwhile? Along with providing affordable housing, they say they find fulfilment in rebuilding the community and providing homes that buyers love. “We made a property that looks like World War II into a modernized building,” says Rupert. “That’s rewarding as you bring a family into new homeownership. And we are taking the building from the vacant list and bringing those properties back to the residents of Baltimore in an affordable way.”